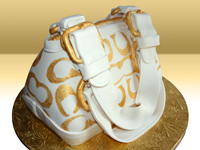
This tutorial post will show you how to carve a three layer cake and decorate it to look like a Coach purse. So let’s get started making your very own 3D Coach purse cake!
Carving the Purse Cake
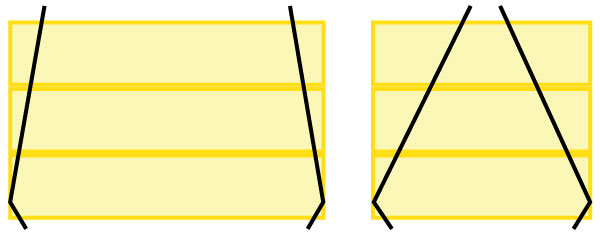
I forgot to take a picture of the cake, but it’s simply a three layer cake carved in a basic shape. Here is a rough diagram of how we carved the cake.You could actually do this with a two layer cake. If you’re careful you can use the two pieces you cut off and then turn them upside down and place them on the top of the cake. This would give you the pyramid shape you need.
Cover the Purse Cake with Fondant
After covering the cake with fondant we added the zipper and trip to the top and base of the cake.
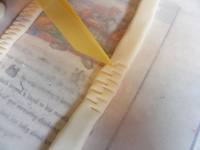
The zipper is simply a snake of fondant with tick marks on the top and painted gold. The trim on the top and bottom were ribbons wrapped around the cake.
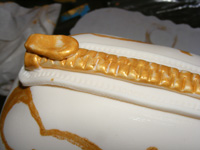
After adding the ribbon around the zipper we added the zipper pull and then painted it. Update: We should have painted the zipper and pull before adding the ribbon.
Creating the Coach “C” Stamp
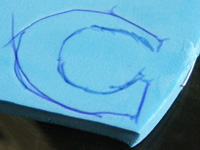
Draw out the “C” on 1/4 inch foam. We searched high and low for a stamp but after two days of looking we decided that we could make our own “C” stamp. We purchased some rubber foam from the local craft shop and traced the shape from a print out.
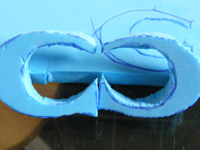
Cutting out the Coach “C” stamps. We used a craft knife to cut out the shape from the foam. It was necessary to cut out two shapes because the pattern requires an inverted C. Update: Looking back I realize that using thinner foam would have been much cleaner & easier to cut out.
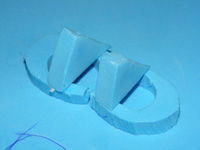
Putting a handle on the stamps. A handle was glued onto the back of the stamps to make them easier to use. Be sure to let them dry fully before using them so you don’t accidentally get glue on your cake.
Stamping the “C” onto the Purse Cake
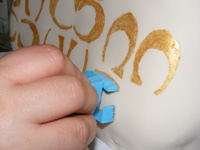
Using the stamp. The stamps worked great! Instead of dipping the stamp into the “paint” we painted the bottom of the stamps; this reduced the dripping effect.
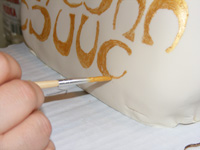
Filling in the stamp. Our stamp didn’t work as planned so we had to carefully fill in the “C” with a small paint brush. Next time will will use a softer foam or maybe a filter type material that will hold the paint better.
Making the Buckles for the Purse Cake
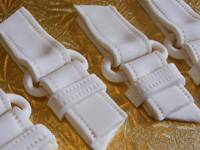
Creating the buckles. While the “C” pattern was getting applied to the cake the buckles were created. Strips of fondant were cut and the stitches were applied before construction. The connectors were created with a simple fondant “snake”.
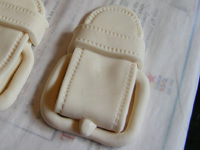
Creating more buckles. Strips of fondant were cut and the stitches were applied before construction. The buckle parts were created with a simple fondant “snake”.
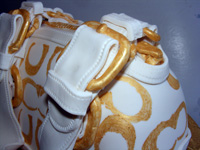
Painting the buckles. After the straps were applied to the cake the buckle parts were painted using a small brush and the same gold paint we used for the stamps.
Adding the Extra Touches
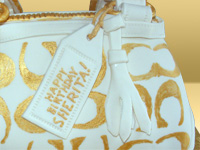
We added the tassels and the “Happy Birthday” tag to finish off the cake.
Conclusion
I hope you enjoyed this Coach purse cake tutorial. You can create just about any purse using these easy steps. Getting the main shape, straps and buckles are the most important details. Putting patterns and other embellishments could make it your own and will impress even more.

